Convert data with a chain of converters
This tutorial will guide you through the process of converting data with a chain of converters. The chain of converters is a sequence of converters that take the output of one converter as the input of the next one. This is useful when you need to apply a sequence of transformations to the data and you are not sure about the columns you need to use.
The ConverterChain converter is a custom converter that inherits from the SklearnLikeConverter class. You can easily create your own custom converters by inheriting from the SklearnLikeConverter class.
Prerequisites
Before starting, make sure you have:
A dataset in DashAI
The ConverterChain converter in DashAI
Step-by-Step Guide
1. Access the dataset section
Navigate to the dataset section in DashAI to access the dataset you want to convert.
2. Open the converter modal
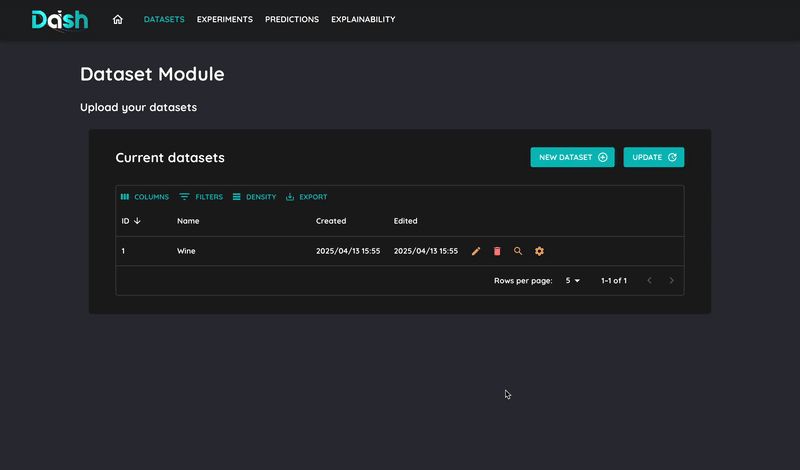
Click on the settings icon of the dataset you want to convert.
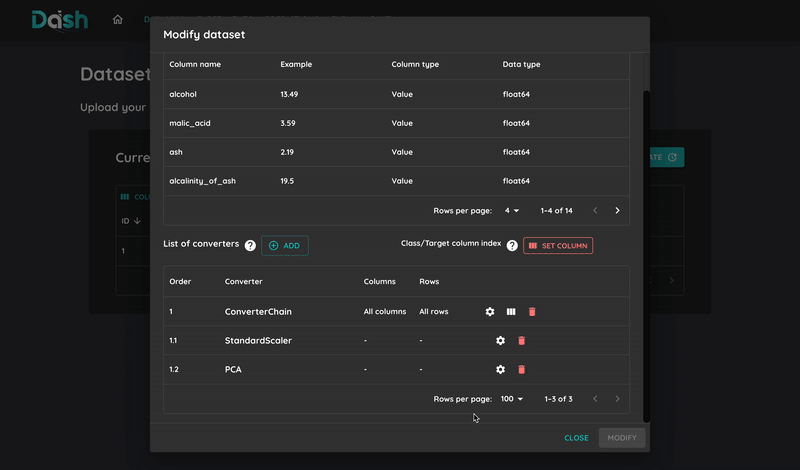
A summary of the dataset will appear, along with an empty table where your converters will be listed.
3. Select the ConverterChain converter
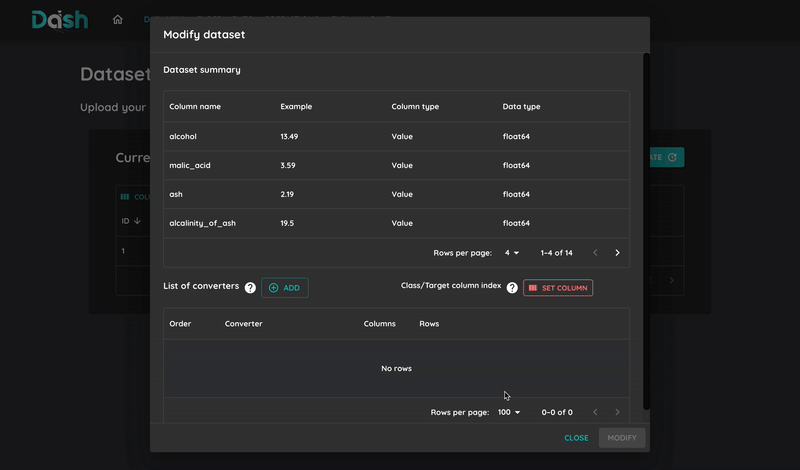
Click the “Add” button to open the list of available converters.
Use the search bar to find the ConverterChain converter.
Click “Add” to include the ConverterChain converter in the table.
4. Configure the ConverterChain converter
Click the settings icon next to the ConverterChain converter to configure it.
Set the number of converters the chain will have.
Click “Save” to apply the settings.
5. Add converters to the chain
Click the “Add” button to open the list of available converters.
Use the search bar to find the converters you want to add to the chain.
Click “Add” to include the selected converter in the table.
6. Configure the converters
Click the settings icon next to the converter you want to configure.
Set the parameters for the converter.
Click “Save” to apply the settings.
7. Set the scope of the chain
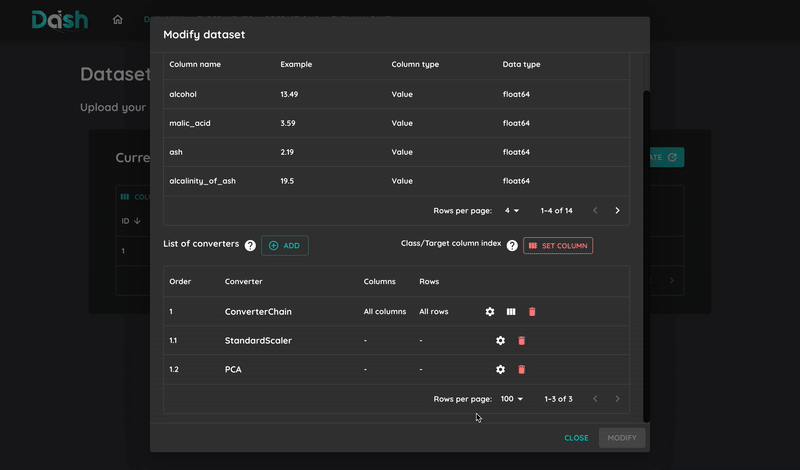
You only need to set the scope of the chain. The scope of the converters in the chain will be set automatically based on the output of the previous converter.
Click the three-column icon next to the ConverterChain converter to set its scope.
Select the specific columns you want to transform.
Define the number of rows the converter should learn from.
Click “Save” to apply these settings.
8. Set the target column

Some converters require a target column to learn from. This column can be labeled as “class” or “target” in the dataset.
Select the text field above the list of converters.
Set the target column index.
9. Start the conversion

Click the “Modify” button to begin the conversion process.
Once the conversion starts, you will see the results in the dataset summary.
Tips and Best Practices
Ensure your chain of converters is properly configured to achieve the desired output.
Ensure the chain of converters is compatible with the type of data you selected for the conversion.
Verify the conversion results to ensure the desired output is achieved.
Troubleshooting
- Common issues:
Missing target column index for supervised converters
Incompatible data types